In this article, I will show you how to create this growing flower animation only using Adobe After Effects!

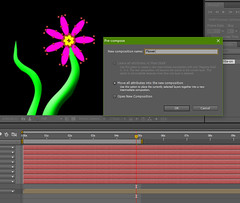
We'll start by creating a new composition called "Main Stalk". Then click
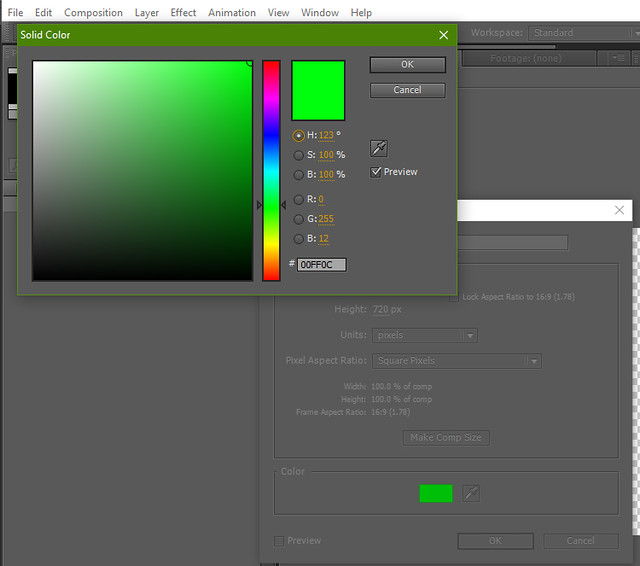
"Layer > New > Solid" to create our new solid layer. Make it a nice organic shade of green, I chose #00FF0C
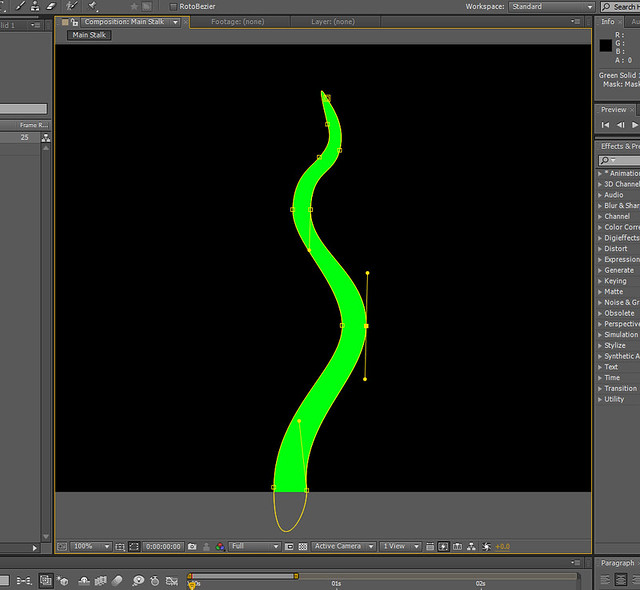
After we have our green solid, use the pen tool to draw a simple winding vertical line from the bottom of the solid layer up to the top.
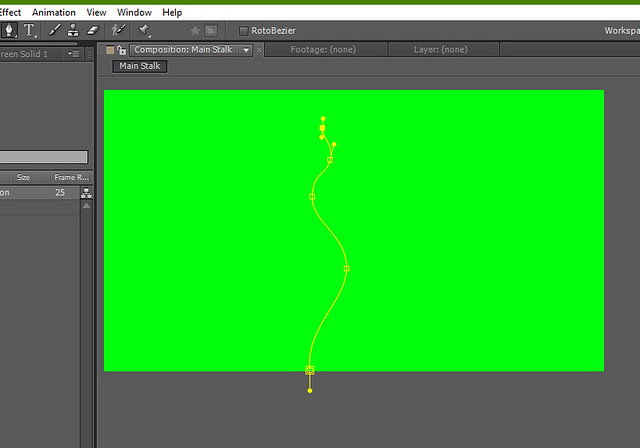
close the mask making sure to use the pen tool's bezier curves to taper the tip to a narrow point. If you're not used to drawing with the pen tool, it can take some time to get used to the bezier curve handles. This shape will be our basic plant stalk.
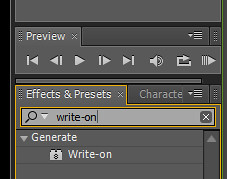
After you have your shape masked out, search the effects search bar for "write on" and apply it to your solid green layer. The write on tool is a very useful tool for gradually revealing a layer
After you have applied the write-on effect, check the stopwatches for "Brush size" and "Brush Position" because we'll want to animate keyframes into both of those properties. Then increase Brush Size to around 37 pixels in size. Also, make sure you change Paint Style to "Reveal Original Image". Lastly, make sure you change Brush Time Properties to the"Size" setting
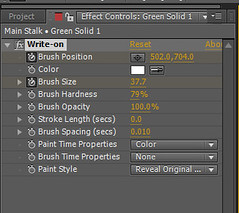
Move the Brush Position crosshairs down to the base of the plant stalk.
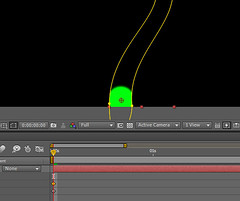
Now here comes the time consuming part, animating the keyframes. Make sure the solid layer is still selected so that you can see the outline of the mask you drew. Then move to the beginning of the timeline and make sure the Brush Position stopwatch is on, and that you have a keyframe at the beginning of the timeline. Then move forward about 5 frames or so and move the Brush Position up a little bit, following the outline of the mask. Then move forward in the timeline another 5 frames and move the Brush Position up a little bit more. As you animate forward, reduce the Brush Size so that it also begins to taper to a point as it gets closer to the tip.
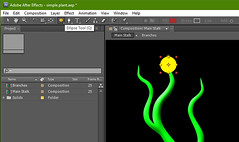
Keep animating the Brush Position along the outline of the mask until you reach the top. Now when you play back all of the keyframes, you should have a basic animation of the mask slowly being revealed from the bottom up, like this.

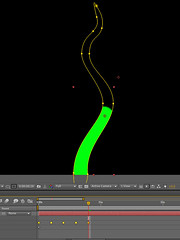
Now comes the fun part! We can add more branches by cheating and simply copying the original solid layer, scaling it, rotating it and positioning it in a way that looks somewhat organic.
The next part is a little tricky and involves some trial-and-error. We need to adjust each branch layer's time in the timeline so that a new branch only starts growing once the previous branch has grown enough.

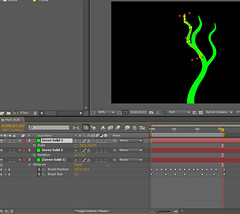
Once you have your timing set up the way you like it, select all three branch layers and select Layer > Pre-Compose and name the new pre-comp "Branches"

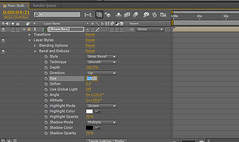
While still in your Main Stalk composition, make sure your new Branches layer is selected. Select Layer > Layer Styles > Bevel and Emboss and apply it to the Branches layer. This layer style will add extra dimention the layer, and help blend the branches together to look more organic.
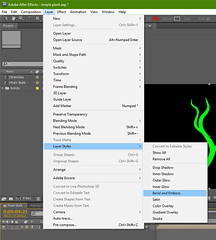
Down near the timeline you can expand the Layer Styles > Bevel and Emboss drop down menu and adjust size to around 23 to give the edges a more rounded organic look
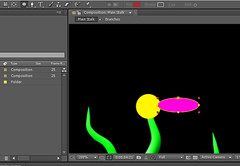
Let's add some flowers! Create a new solid layer by clicking Layer > New > Solid and make it bright yellow #FFF600. Then use the Ellipse tool to cut a small circle near the tip of the middle branch layer
We can add petals to the flower in much the same way, Layer > New > Solid and make it any color you want. I chose #FF00DE. Then use the Ellipse tool to make a long oval.
Copy as many pedals as you want and rotate them until they look right. Then pre-compose all of the pedals and the center ellipse and call the new composition "Flower"
We can add the bevel and emboss layer style to the flower in the same way we did to the branches, Layer > Layer Styles > Bevel and Emboss. Now we need to animate our flower's growth. This is very simple and only involves the scale tool. Move the timeline to the last keyframe of the branch animation and Start the flower's scale at 0. Then 10 frames later, turn the scale up to 100. You can ease-out the animation keyframe by selecting the keyframes and pressing f9 on the keyboard. If you want, you can make copies of the flower to add to the tips of each branch. Finally, you should have something like this.

And we're finished! Optionally, you can add leaves growing up the side stalks in much the same way as we created the flowers
This is the same basic method that I used in my video How Do Flowers Grow From Seeds so be sure to check that out if you haven’t already :)