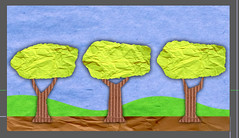
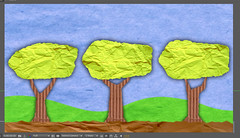
In this tutorial you'll learn how to create this stylized paper cut-out animation using After Effects and a few image textures!
To make this animation we'll only need these 3 paper textures below. Click on each of the pictures to download them from flickr.
Crumply paper texture

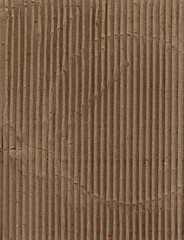
Cardboard texture
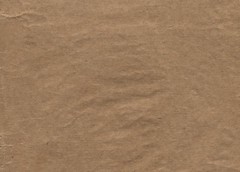
Brown paper texture
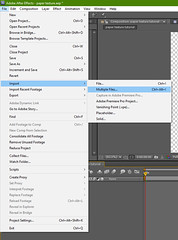
We'll start by making a new composition sized 1280 x 720. Then click File > Import > Multiple Files, and import our 3 new image textures.
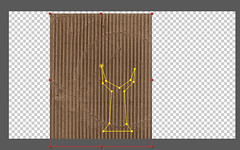
Then drag the cardboard image texture into the composition and scale it down to 23 so that it fits within the composition. We'll name this layer "Trunk 1"

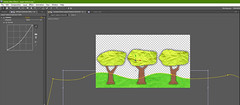
Use the pen tool to draw this mask pattern on the cardboard texture. This shape will be be our basic tree trunk shape
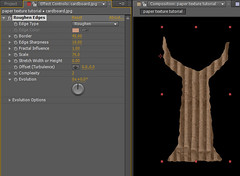
To make it look like this shape was cut out of a real piece of cardboard, we will need to make the edges look less straight and clean. Search the Effects Search bar for "Roughen Edges" and set Border to 45.00 and set Scale to 76.0
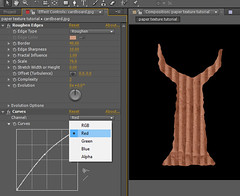
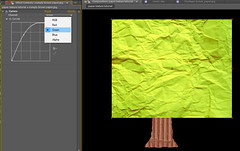
We can adjust the color a little bit to bring out the warm tones in the image texture. Search the effect search bar for "Curves". Curves is my favorite color correction tool in after effects, it lets you adjust the brightness/contrast and the red/green/blue values by clicking and draging on the diagonal curves line. Right now we only need to change the RGB tab to Red. Now click and drag up on the middle of the diagonal curve line to increase the red just a little bit
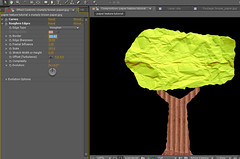
Next, we'll start making the tree's "leaves" Start by importing the "crumply paper texture" and scale it down to 88. We'll name this layer "Leaves 1".
We can use the same Curves color correction effect to change our crumply paper texture to a nice leafy green color
We can use the pen tool again to cut the leaves shape out of the image texture. Make sure you use the pen tool's bezier curves on every point to make the rounded edges. Just click and drag with the pen tool when drawing points to enable the bezier curves.
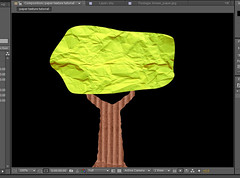
Use the Roughen Edges effect on the Leaves 1 layer and change Border to 22.00 and Scale to 193.
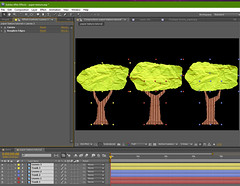
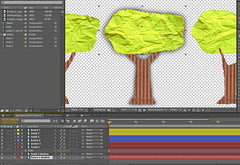
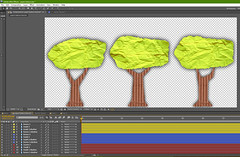
That's basically all it takes to make a tree! Now we can make copies of this tree by selecting both the "Trunk 1" and "Leaves 1" layers and Edit > Copy and Edit > Paste. Rename the copies to "Trunk 2", "Leaves 2" and "Trunk 3", "Leaves 3" I would also recommend changing the layer colors for each copy to make it easier for you to tell them apart in the time-line. To do this, just click the little colored box to the left of the layer name and select a new color for each copy. I set layers 1 to red, layers 2 to blue, and layers 3 to yellow. To make each copy look more unique, I made some minor adjustments to the mask points of each copy, so that they don't just look like completely identical copies.
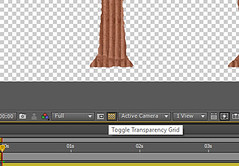
To make this effect look even more like a physical paper cut out, we can add a drop-shadow to each tree layer to make it look like cut out pieces of paper are laying on a surface. But it will be difficult to see the drop shadow with that black background! We can toggle the transparency grid background by clicking the little checker icon just below the viewport.
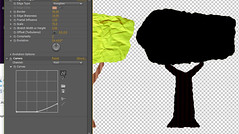
To make the drop-shadow of our first tree, we'll need to copy and paste both the Leaves 1 layer and the Trunk 1 layer. Rename the copied layers "Leaves 1 shadow" and Trunk 1 shadow respectively.

Select the "Leaves 1 shadow" layer and then click the curves effect. Drag the RGB curve all the way down to make the layer completely black. Do the same for "Trunk 1 shadow".
Now search the Effects Search bar for Gaussian Blur and add it to the "Leaves 1 Shadow" layer. Turn the Blurieness setting up to 45. Then add Gaussian Blur to the "Trunk 1 shadow" layer, but this time turn the blurieness setting all the way up to 120.
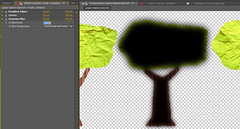
Now that we have the shadow, move the "leaves shadow 1" and "trunk shadow 1" layer under the"trunk 1" and "Leaves 1" layers. This gives us a nice drop-shadow effect behind the tree, making it look more like a physical paper cut out.
Now repeat the drop-shadow process for the other trees.
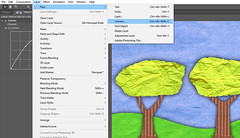
To make all of these tree layers easier to deal with, let's pre-compose each tree into it's own composition. Select all 4 layers of each tree and then click Layer > Pre-compose to combine all 4 of each tree into it's own composition. Now each tree will be separated into it's own composition, and it will make managing the layers much easier.
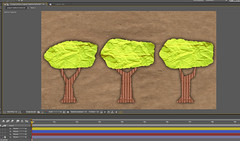
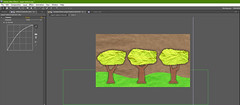
Now that we have our trees pre-composed into their own compositions, let's start creating the environment that they'll be in! We'll start with the rolling green hills in the background. Import our brown paper texture and put it under our trees layers. don't worry about it's scale for now because we'll be resizing it again later.
Now go back to the Effects Search bar and type in Curves again. We'll increase the green quite a bit, and decrease the blue slightly to get a nice grassy green color.
Now use the pen tool to cut out the rolling wavey hill shape for the background. Again, make sure to use the pen tool's bezier curves by clicking and dragging every time you make a new point! We can add a drop-shadow to the hills layer the same way we did for the trees. Just copy the hills layer, make the copy black, add a blur effect and put it behind the original.
Now that we have our background hills, Let's make the sky! We can use the same brown paper image texture that we used for the hills.
Use the Curves color correction effect to increase the blue and decrease the red slightly. And that's about all we need to do to the sky!
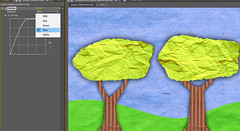
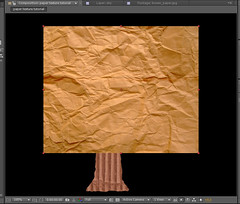
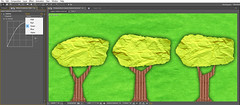
Now we can make the ground layer. We can use the same crumply paper layer for the ground that we used for the tree's leaves. just change the position so that it is close to the bottom and mostly under the trees, as illustrated in the picture.
We can use the same Roughen Edges effect again to make the ground layer look more bumpy and organic. Just change Border to 12 and Scale to 83.
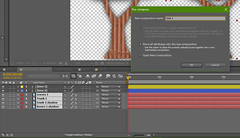
We basically have created everything we need. We can copy more trees if we need to later but for now let's get to the really fun part... 3D layers! Well, more like 2.5D... You'll see what I mean in a minute! But first, whenever we work with 3D layers, we need to add a Camera to our composition. Click Layer > New > Camera > OK. A window will pop us saying "Camera and Lights do not affect 2D layers" click OK. So in the next step, we'll turn our 2D layers into 3D layers!
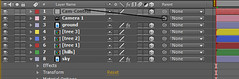
To turn our 2D layers into 3D layers, click the little 3D cube icon for all of the layers.
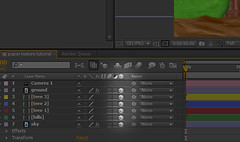
You'll notice that we have a new layer called "Camera 1". This is what we'll use to control the point of view. However, the camera's position controls aren't very easy to control. So we'll make a new null object and parent the camera to that null object. that way, whenever we move the null's position, the camera's position will match it as well. Click Layer > New > Null Object and name it cam-control. Check the 3D cube icon for cam-control as well to make it a 3D layer. You can parent the camera to the Cam-Control by clicking the camera's "pick whip" icon, which looks like a little spiral, and dragging it to the cam-control layer.
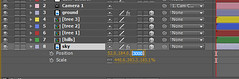
Now we can control the camera's position by changing the position of the cam-control layer! But before we do that, let's set our Z positions on all of our layers. Up until now, we've only been moving in the X and Y dimensions, but now that we're working in 3D we have a whole extra dimension to work with! We'll start by pushing the sky's Z position waaaay back to 3000 so that it's far back in the background. After pushing it so far back, we'll also need to scale it up to 183 so that it covers the entire viewport.
Now we'll do the same thing for our background hills. But our hills need to be closer to the camera than the background sky, so we'll set the hills Z position to 1500, then scale it up to 247.
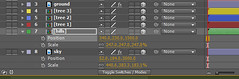
The Z index for our trees can remain at 0, but we can bring the ground layer a little bit closer to the camera by setting it's Z index to -200 and it's scale to 200.
Once we have our Z index positioning setup the way we want it, we can adjust the Cam-Control's X position and observe how the different layers appear to move based on their position on the Z axis. The Sky being the furthest back at a Z position of 3000 moves much slower than the hills at Z 1500, which are a bit closer to the camera. The trees movement is much more noticeable at a Z position of 0, and the ground layer is closest to the camera, so it's movement is the most pronounced of all.
To animate our cam-control's X axis like in the demo GIF, move to the beginning of the timeline and change the cam-control's X position to 640. Then click the cam-control's position stopwatch to enable keyframe animation. Then move 3 seconds forward in the timeline and change the cam-control's X position 76. This should automatically create a keyframe 3 seconds in the time line. Then move the timeline forward another 3 seconds, and move the cam-control's X position back to it's original position of 640. This will create a 6 second loop of the camera moving left to right. You can make the camera keyframes ease in by right clicking over each keyfame and clicking Keyframe Assistant > Easy Ease.
Now we can optionally copy more trees in behind the first row of trees. Just copy and paste the trees we already created and move their Z position back to 800. We can darken them a little bit too, to make it look like they are in the shadow of the foreground trees by using the Curves effect.
And we're finished! You can move the camera's Y position to fly up above the trees, or even increase the camera's Z position to fly through the trees, like you're running through a forest! use your imagination!
This is the same basic method that I used for my paper animation, so if you haven't already seen it, check it out! :)