Free clean water for anybody, anywhere.
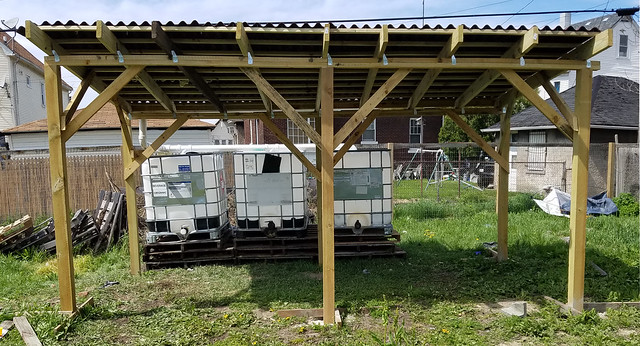
Nobody should ever be without clean water. Any region in the world with a few inches of rainfall can capture that rain water, filter it, purify it, and put it to good use. My friend has an urban farm where she grows fruit, vegetables, and herbs. But there was no reliable source of water on her land and she had to have water hauled in. So I designed and built this simple structure on her land to capture, filter, and store rain water for agricultural irrigation. With additional filtration and sterilization, this system could also be used to provide safe drinking water.
Now I'm putting the plans and instructions online so that anybody around the world can build their own off-grid stand alone rainwater collection system. This particular structure is 128 square feet, measuring 8 feet wide, 16 feet long, and 8 feet 6 inches tall. We contacted the local building department and they told us that we don't need a permit for any structures less than 200 square feet.
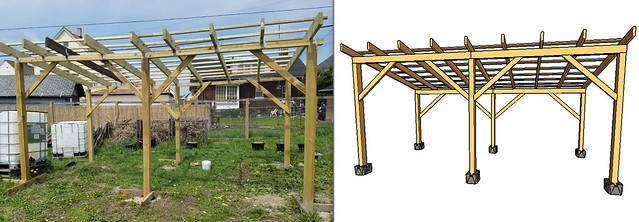
Step 1: Posts
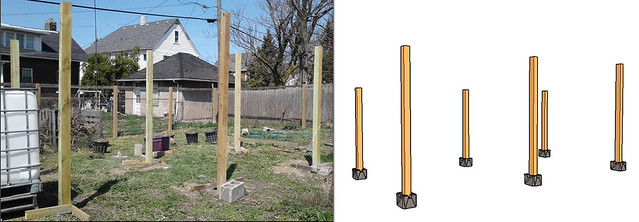
I used 10 foot long 4x4 posts buried 48 inches deep in the ground with concrete. The posts are spaced 8 feet apart from each other. The front posts are cut 7 feet 5 inches tall, and the back posts are cut 6 feet 5 inches tall.
Step 2: Beams and Braces
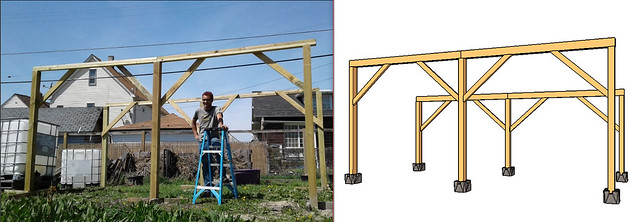
Beams are horizontal 8 foot boards that sit on the posts. Braces are the smaller 4 foot long boards at 45 degree angles that provide support.
Step 3: Rafters
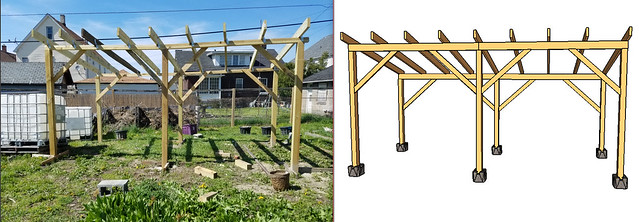
The rafters are 10 foot long 2x6s with a 6 inch overhang on the low end, and about a foot of overhang on the high end
Step 4: Purlins
Purlins are long thin strips of wood that measure 1 1/2 x 1 1/2 inches and 8 feet long. They sit on top of the rafters spaced 1 foot apart. Purlins provide support for the roof pannels, as well as a surface to drive the roofing nails into.
Step 5: Roofing
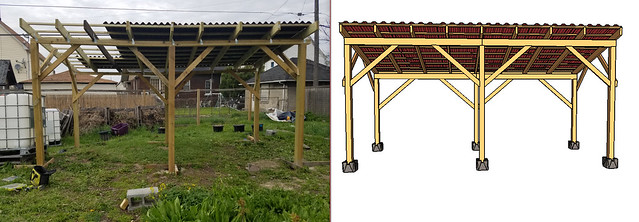
I used corrugated asphalt roofing panels from a company called "Ondura" They measure 6.5 feet by 4 feet and they are very flexible and easy to cut and work with.
Step 6: Gutters, Pipes, Containers
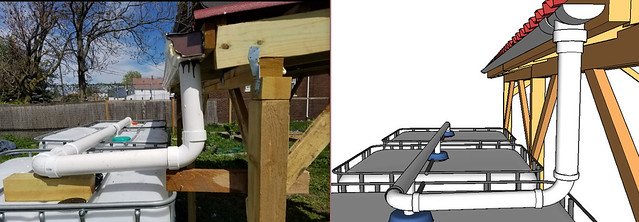
The metal gutters are only needed on the low pitch of the roof. There is a filter in the gutter to keep leaves and debris out of the water. I attached a 3 inch PVC pipe to the downspout of the gutter using a two part epoxy called JB Weld. The PVC pipes direct the gutter water into three water containers. Once the water fills the first container, it will flow up into the pipe to the second container, etc... Each container can hold 255 gallons of water, so all three hold a total of 765 gallons of water. We could continue to add as many containers as we wanted.
Step 7: Collect free water
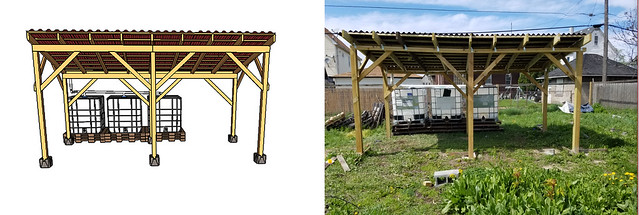
We will attach irrigation lines to the containers to water our crops this summer. This system could be cheaply and easily replicated anywhere in the world that has a few inches of rainfall, especially in places with no groundwater for a well, or in situations where the cost of drilling a well would be too cost prohibitive.
Step 9: Optional: Enclose Walls to Make Greenhouse Nursery
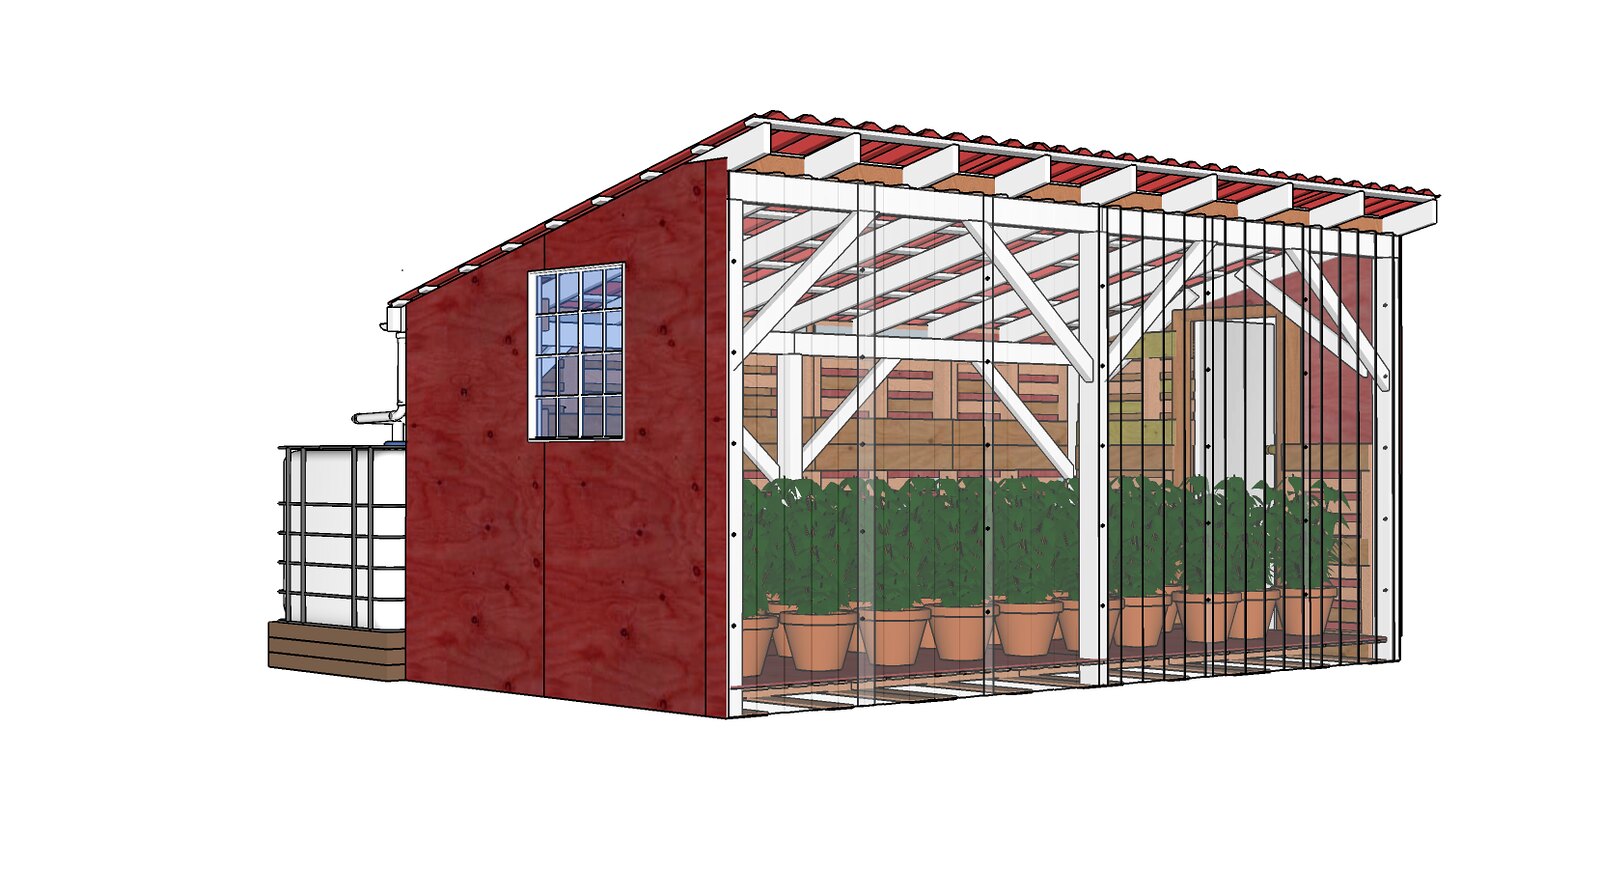
In the future, we would like to enclose the walls. I build the high side facing south, so we could put big windows covering the whole wall to create a greenhouse using transparent plastic roofing panels. The north, east, and west walls can be framed using strong pallets, clad in painted plywood. The inside of the pallets can be stuffed with straw for insulation.
Download my 3D model to edit and build your own!
To interact with 3D models, make sure you have enabled third party cookies and site data. You'll also need a browser that supports WebGL.
Click the image below to interact with the 3D model.
After the model loads, click the "<" Icon to the right for camera control options.
Click here to download this model as an editable SketchUp file.